
Storm window installation is one of the most cost-effective solutions for upgrading energy inefficient existing windows. They’re easy to install and cost a fraction of replacement windows. In fact, installing a low-emissivity (low-e) storm window over a single pane window can lower your utility bill just as much as replacing the window with a new energy code-level window.
Coated with an ultra-thin, virtually invisible layer of metal, low-e windows reflect infrared heat back into the home. This coating improves the window’s insulation ability, in turn lowering your heating and cooling costs. On average, low-e storm windows can save you 10%–30% in heating and cooling costs. This equates to $100–$300 in annual savings, assuming a $1,000 annual heating/cooling bill. Information on energy performance is available for all rated products through the Attachment Energy Rating Council (AERC). Look for storm windows that have the Energy Star label.
After deciding to install a storm window, your first step will be to choose which type is right for your home. All storm windows will make your home more energy-efficient, but you can choose between different materials and coatings, and whether you want to install them on the exterior or interior of the home. We’ll focus on exterior storm windows, which fit on all standard double-hung windows and are the most common type installed by homeowners. Outward-swinging windows require interior storm windows. More information on interior-mounted storm panels be can found at DOE's Building America Solution Center.
When installing any storm window, there is a slight risk of condensation developing between the existing window and the storm window. To minimize this risk, before installing the storm ensure that the original window is as air tight as possible by caulking the tops and sides (jambs and head), follow the manufacturer's installation instructions, and use a product that includes weep holes at the bottom of the frame to further reduce any risk of condensation between the storm window and the existing window.
PROJECT LEVEL
EASY
ENERGY SAVINGS
12%–33% annually
TIME TO COMPLETE
20–30 minutes per window
OVERALL COST
$60–$200 per window
Before You Start
- Ensure that the window and adjacent surfaces are dry. Fix any missing glass, rotting wood, broken parts, and water leaks.
- Get your new storm window measurements.
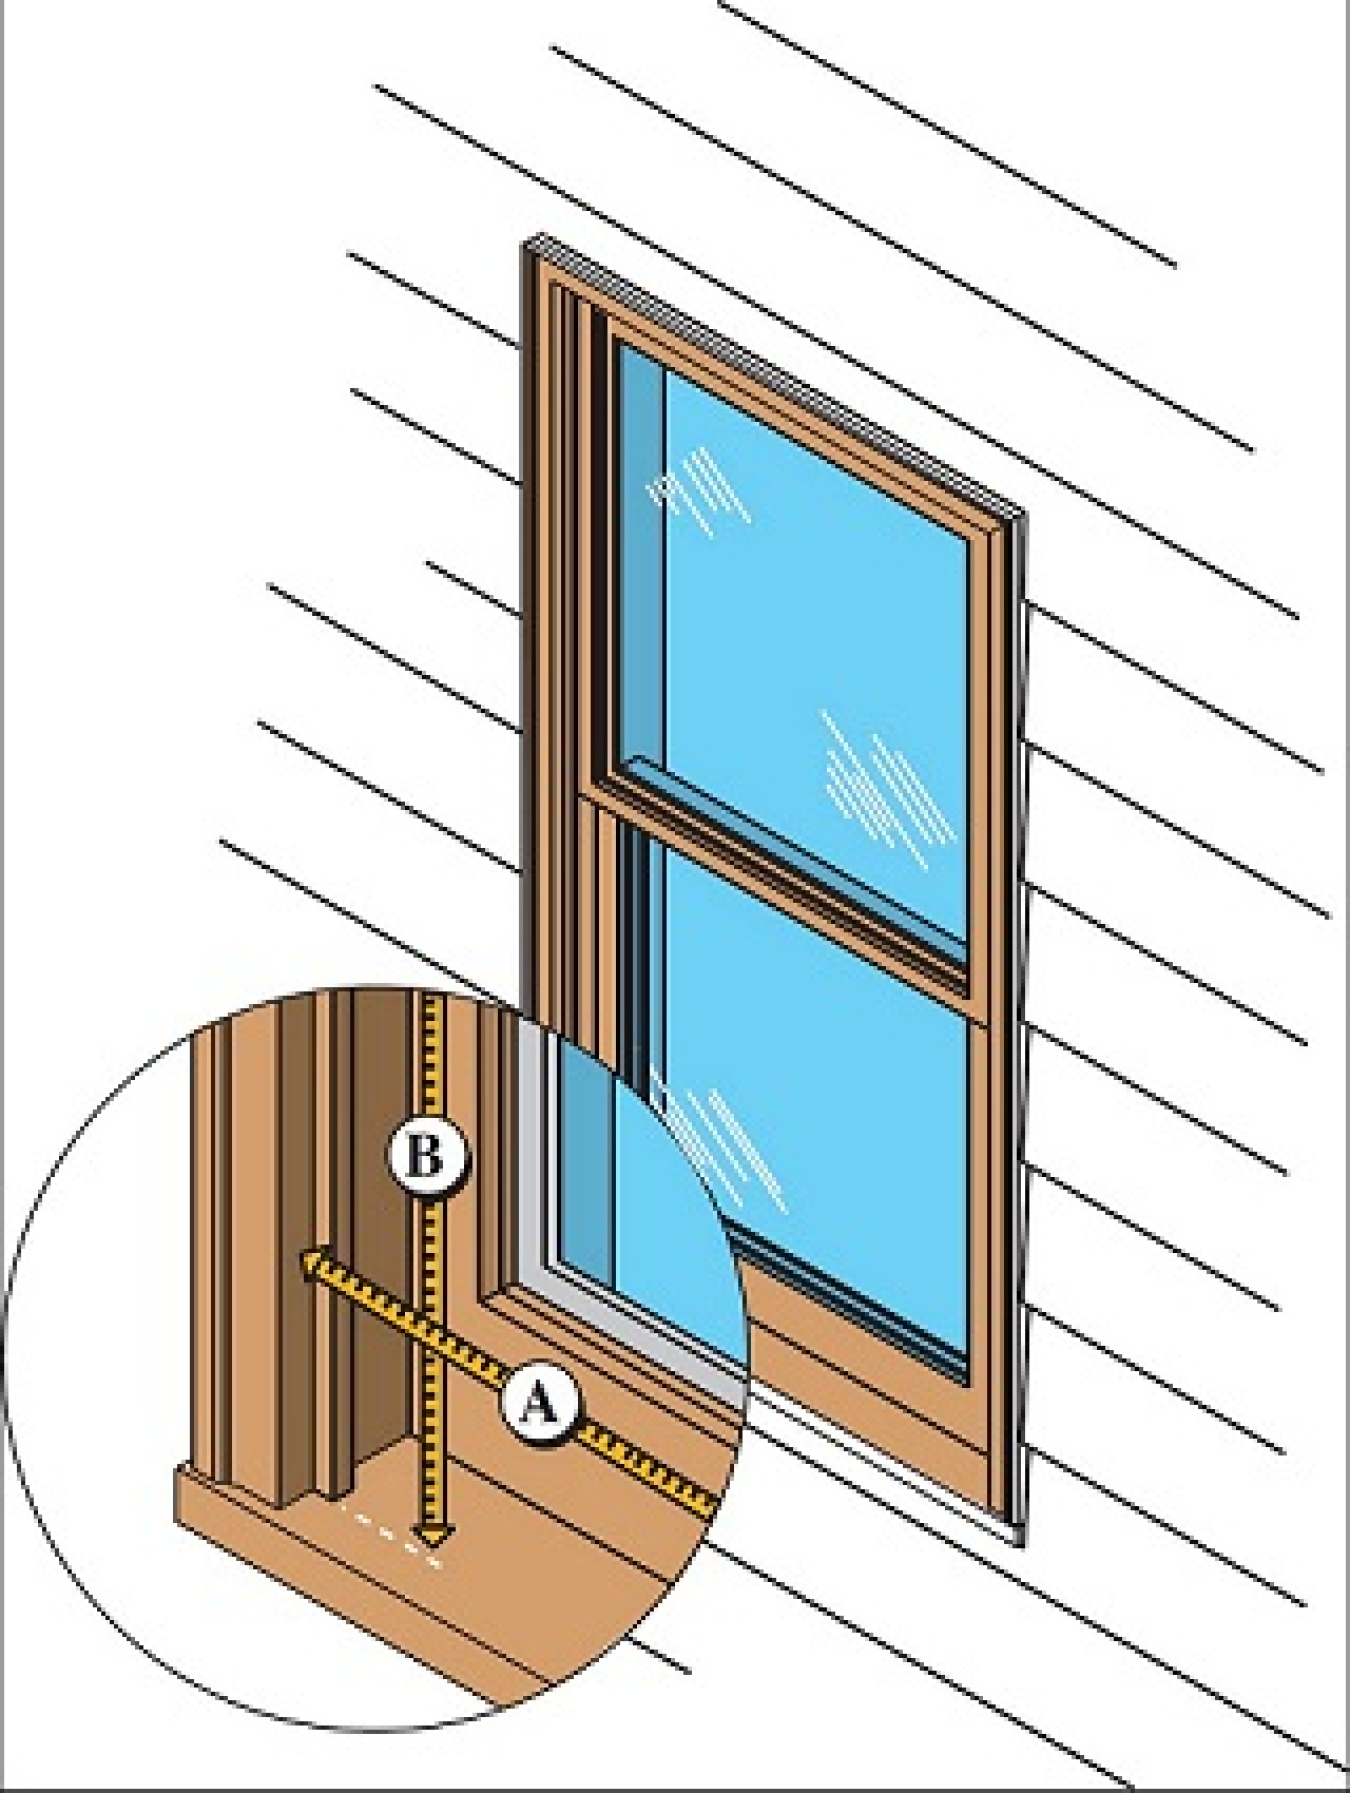
- Measure the width between the inside edges of the window casing in three places: at the bottom, top, and middle of window (round down to the nearest 1/8 inch).
- Measure the height from the top of the window casing to the sill at its highest point (again, round down all measurements to the nearest 1/8 inch).
- If the horizontal measures differ, use the smallest of the three when ordering a new storm window.
Shopping List
- Storm window
- Tape measure
- Screwdriver
- Putty knife
- Caulk
- Caulking gun
Step-by-Step Instructions
-
Position the storm window into the opening to check for proper fit.
Determine the top of the storm window by noting which direction the movable panels (if applicable) operate. Center the storm window in the opening. Ensure that all screw holes land on solid wood.
-
Remove the storm window.
-
Caulk the top and sides of the existing window opening. Do not caulk the bottom sill.
Hold the caulking gun at a 45-degree angle to the edge of the window. Using a “pulling” motion, hold the gun at a consistent angle and slide the tube nozzle along the joint while evenly pressing the trigger of the caulk gun.
-
Reposition the storm window into the opening.
Ensure the top of the storm window is pushed up snugly into the very top of the opening.
-
Secure the storm window to the window frame.
Using your screwdriver and the screws, temporarily secure the top corners of the window.
-
Adjust the expander on the bottom of the storm window.
Typical storm windows will come with a window sill expander, which allows the bottom of the storm window to expand (around ½ inch) to meet the angled sill of the window opening. Use your putty knife to tap down the adjustable expander tight against the windowsill. The expander should make even contact across the bottom sill.
-
Square up the window unit, and then install the remaining installation screws.
Make sure the gap between the window and the frame is even (the ideal gap is 1/16 inch on each side of the window).
Installation videos and more detailed guidance can also be found at DOE's Building America Solution Center.
Subscribe to receive updates from Energy Saver, including new blogs, updated content, and seasonal energy saving tips for consumers and homeowners.